Calfalleyandtub.com
  • Home
  • Features
  • About Us
  • Contact
  • Set-Up Instructions
  • Home
  • Features
  • About Us
  • Contact
  • Set-Up Instructions

Set-up Instructions

Picture
Picture

Set-up

Click for printable instructions.
​
1. Remove pin, sliding hitch forward for removal.

2. Lower front of alley with cable winch.


​

3. Remove the pins securing the wheel assemblies, releasing each wheel simultaneously if possible.  Release the winch three revolutions, then reset the lock mechanism.  Pry the tire forward to start the release. When the cable becomes tight, continue this process until you are confident you can maintain total control of the winch.  Should the winch escape your control, step back and DO NOT attempt to grab the handle. Leave the wheel assembly on the side of the swing gate slightly elevated.


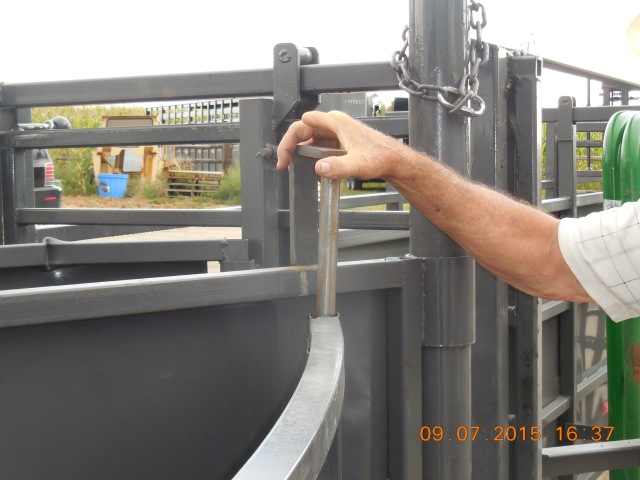
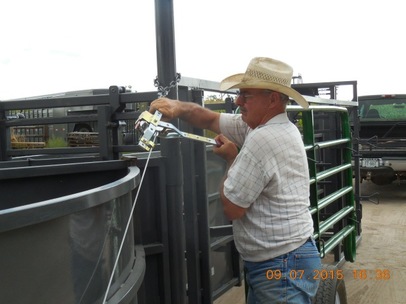
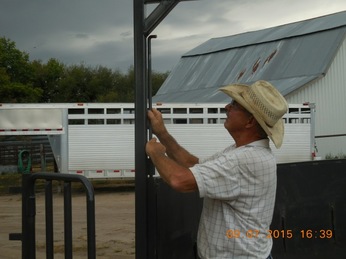
4.  Vertically remove the yoke securing the hinged portion of the tub to the swing gate.  Reverse the yoke position 180, thereby securing the deflection panel inside the tub to the swing gate.  
​


​
5.  Remove the come-a-long winch.
Picture
Picture
Picture
6.  Vertically remove the rod connecting the movable overhead brace to the rear of the tub.  Rotate the overhead brace and the hinged tub section to the outside, connecting them together with the rod.

7. Finish lowering the wheel assembly previously left slightly elevated. Ensure all frame components are flat on the ground.
Return to Transport Mode:
For transport mode, reverse the above procedures with the exception of step 3.  While operating the winch to raise the system, the lock mechanism will be in position automatically.

Printable instructions without photos.
Proudly powered by Weebly